 Since 2012, when I bought the BAK Roll-X tonneau cover for my 2011 Ford F-150, BAK has redesigned their signature roll-up tonneau cover enough to call for a new name: Revolver X2. In addition, they’ve released the BAK Box 2, a tool box which was designed to work with their truck bed covers, hence the dual installation and review post. Continue reading for my installation and review of these two products.
When I bought my new 2015 Ford F-150, I knew that eventually I’d be installing a bed cover, since I use it to haul tools and luggage quite often, and having those items secured out of the elements and prying eyes is a big benefit. After having such a positive experience with the BAK Roll-X, I went online to order one, only to find that they didn’t make it for my new truck, and in fact it’s only available as long as supplies last. It’s been replaced by the Revolver X2, which features virtually the same setup – aluminum slats, hinged together and coated in vinyl, with latches at the tailgate and rotating “C” channel that lock the cover down. This all works together to create a large trunk out of the bed of a truck, if not quite as water tight as a car or SUV’s trunk area.
So, I called BAK Industries and placed an order for the Revolver X2, and while I was at it, I ordered the BAK Box 2, to replace my current solution for storing “truck stuff” in the bed, a 12-gallon plastic container. The company was responsive to my timing needs, as I needed to have the bed cover installed in less than two weeks, so I could drive to Pennsylvania for my wife’s first baby shower, and shipped it out as soon as it was built (the company builds their covers to order).
I ordered the cover on a Wednesday, and got a tracking number two days later, on Friday. The expected delivery date: the following Thursday, just a day before I had to travel. From California to Maryland, the cover showed up Wednesday, a day ahead of schedule. This worked out well, since the temperature that night was 25 degrees fahrenheit (with a windchill of 14), and temps were expected to drop another 10 degrees the next day.
I’ll start with the installation of the tonneau cover, then cover the tool box installation, and then my review of both items. Click here to skip to the reviews, if you’d like.
Before you begin: The difficulty on these installations is easy-to-medium. Total time: Give yourself 1.5 hours to get everything adjusted properly. Tools needed: 1/2″ ratchet wrench, 9/16″ ratchet wrench, screw drivers, 2nd person (not required, but quite helpful).
Installation of Revolver X2 Tonneau Cover:
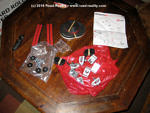
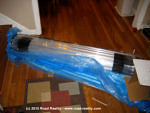
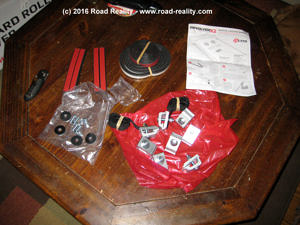 Unboxing the new cover and tool box, I noticed an improvement over the packaging of the Roll-X. The Revolver X2 package now proclaimed the company and product name in big, bold lettering. Inside was the expected medium-density foam and plastic wrap. Yup, BAK hadn’t lost their way, even though they are selling a lot more truck products now than they were 4 years ago. Good to see!
Next up was reading the instructions. Last time, the instructions were woefully incomplete, and I even think the company took my last write-up and made it part of their own instructions (I had received a replacement cover when one of the seals broke loose – great customer service, and those instructions were far better). The instructions for the Revolver X2 were complete and thorough, helping novice installers complete a quality job. It’s all in the details for something like this, and showing a visual of exactly how the latches are to be lined up, really helped nail the installation for me, and I’ve done it before.
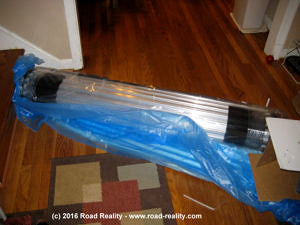 Once I had everything laid out and understood that not much had changed since my last tonneau cover installation, I invited over a friend and we got to work. While the instructions don’t specifically mention a second set of hands, they come in handy in getting the rails on right and lining up the cover, especially when it’s below freezing outside and the rubber isn’t prone to lay flat. The cover itself is also heavy and cumbersome to carry, another area where a second person is helpful. To say conditions were less than optimal for installing this bed cover, would be an understatement.
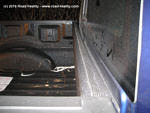
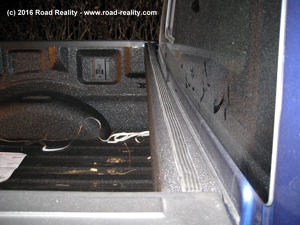 Start by installing the supplied rubber seal on the top of the front of the bed, as shown in the picture, except closer to the rear edge of the front rail. When properly aligned, the rubber seal works, but isn’t fully covered by the cover. The instructions should better explain the seal’s positioning.
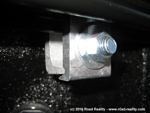
The rails install quickly, with alignment bars that push up against the front of the bed, and are bolted on using 6 clamps – 3 per side. Make sure the teeth in the clamps line up with ridges on the rails, and push down on the section of the rail above the clamp, and you’ll be good to go.
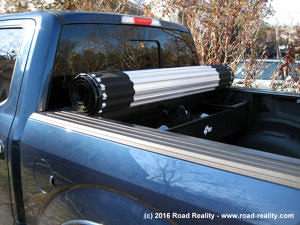 Next, the bed cover itself goes on. It’s shipped rolled in reverse, so you’ll want to lay it on the rails at the tailgate and unroll it towards the cab. Once there, you can slide the supplied bolts into slots on the cover and through the slots in the rails. Install the rubber and metal washers, followed by the lock nuts, and get them finger tight, as shown in the instructions.
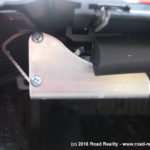
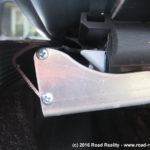 Now comes the hard part. You’ve got to get the cover lined up evenly between the rails so that both latches contact their respective rail-mounted bars. These bars are what rotate the “C” channel down into position to lock the cover in place. This takes some trial and error, and you also want the bed cover to be positioned rearward so that the tailgate contacts the cover’s O-shaped rubber seal, preventing water from coming in there.
Once the cover is properly positioned, the instructions say to roll up the cover and tighten the nuts down on the rail bolts, but as I said earlier, I recommend getting them finger tight to begin with, so that once the cover is adjusted, it’s harder to misalign. Tighten the bolts down so that the cover can’t move around and out of alignment, test to make sure it rolls and unrolls correctly, and you’re all done.
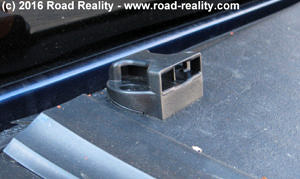 The final step on installing the bed cover is to install the tie-down straps for the cover. These are no longer affixed to the cover/rail bolts, and instead use a separate clamp, the same as what’s used to hold the rails in place. They bolt on the same way as the rails, and use a horizontally-mounted snap to hold the cover in the rolled-up position.
Click here to skip to the reviews.
Installation of BAK Box 2 Tool Box:
The unboxing of the BAK Box 2 is the same as the Revolver X2 – namely, the packaging is well done. This installation was new to me, so I read through the instructions twice before starting, to prevent extra time spent in sub-freezing temperatures. These instructions are also complete, and seem even more complex than the Revolver X2’s, so pay close attention.
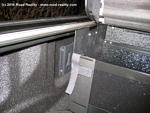
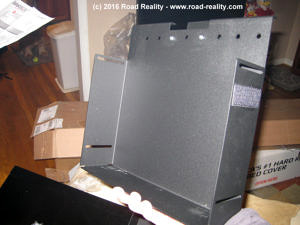 The installation starts by pre-building parts of the tool box. The “U”-shaped end caps contain a backing piece which you have to loosely install, which will eventually hold them in place on the bed cover’s rail system. The reason BAK uses these end caps is for a universal installation, as I’ll explain later.
Once the end caps are built, you can move outside and start the rest of the installation. Line up the end caps so they are centered on the bed cover’s strap clamps, and loosely tighten them down, following the instructions. Make sure they’re lined up side-to-side.
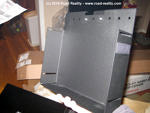
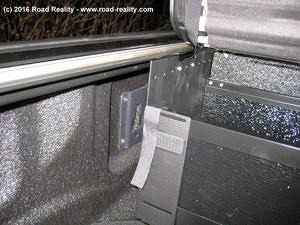 Now, take the tri-fold tool box itself, and lay it into the end caps. Use the velcro straps to hold the front section in place while you bolt the back section in. There are holes in the tool box’s back section which line up with slots in the end caps. Center the tool box in the end caps, and start tightening them down with the supplied nuts and bolts. Here’s where the universal installation comes into play: since the BAK Box 2 is designed for multiple full-size trucks, with differing widths between the bed rails, the company designed a solution that fits all of them equally. I found that on my truck, there were no gaps between the flat panels of the end gaps and the ends of the tool box itself – they lined up perfectly.
Once this step is done, release the velcro straps and you rotate the tool box’s bottom and front sections up, over, and behind the tool box’s back. This gives you back the 10″ of space the tool box took up, if you need that space for hauling other stuff. If you haven’t tightened down the end cap clamping bolts enough, the tool box won’t rotate, so once it rotates, you know they’re tightened down enough.
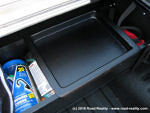
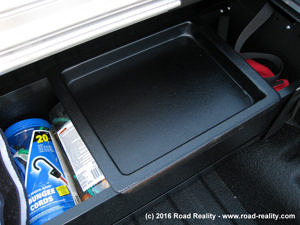 Put the tool box back into position, velcro the front into place, and the provided sliding tray drops into place, providing a place to put smaller items.
Pro Tip: The sliding tray can be used to hold all the hardware and your tools while you’re doing the installation, keeping the little parts all in one place.
Review of Revolver X2 and BAK Box 2:
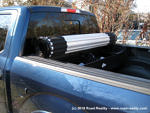
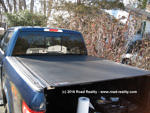
With the installation done, it’s back to business as usual with the truck. The bed cover’s flush profile is appealing and seamless with the truck, giving it a factory-installed look. The redesigned latch points look, in fact are, stronger. The cover itself is smooth, with a leather-like appearance, and the seals cover the front and both sides. The tailgate of my truck closes tightly against the seal, only letting in a small amount of water. No water has gotten in at the front or on the sides, so it’s fairly water resistant.
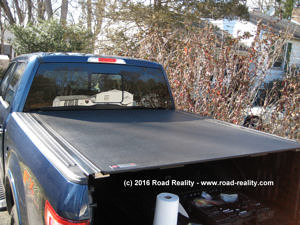 The tie-down straps which hold the cover in the rolled-up position have also been redesigned, and feature a sliding adjuster. Once you’ve adjusted them once and snap the adjuster’s locking clip into place, it’ll stay that way. Nicely done! The snaps that are now horizontally mounted on the cover, instead of being riveted on with straps, so hopefully they prevent freeze-up better than the previous cover’s design – it got packed with snow and you had to clean them out before you could snap the strap’s clasp in.
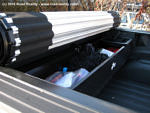
The tool box is a nice unit, 1/2″ thick FRP (Fiber-Reinforced Plastic), and looks tough. I’m not sure how well it’ll hold up to just tossing metal tools and other items in there, but given BAK’s reputation, it ought to last. My biggest complaint is that there is no lid to the tool box, so if you’ve got lighter items in the tool box and you drive with the bed cover open, there’s a chance something could go flying. I’ll see how well that works when I have to do it, but just know going in that this is how it is.
Overall, between the packaging, installation instructions, fit & finish of the materials used, and the functionality, I’m really pleased with BAK’s newest products. I know that should I have a problem – and I’m not expecting to – the company is responsive to its customers and stands behind its products. The cover works well, and short of some freezing rain sticking the rail seals to the rails, I’ve not had any issues with it. The tool box is a great place to store your tie-down straps, hitch ball mounts and balls, bed net, or other items truck owners should have in their trucks. I also keep gloves, a towel, a plastic sheet, bungee cords, and my vehicle recovery kit (strap, shackles, gloves) in the tool box as well. It’s nice to know that this stuff will stay dry and in one place whenever I need them. It’s also nice to know that should I need a little extra room, I can move my truck stuff to inside the cab and fold the tool box up and out of the way.
Suggested Retail Prices*:
BAK Revolver X2: $899 and up
BAK Box 2: $249 and up
*These prices are for the 2015 Ford F-150. Other trucks may have different prices.
Thanks to Charly at BAK Industries for his quick response in helping me place my order and get it shipped out and to me on time.
by John Suit


This is really detailed. It’s the first time I’ve come across your site and you really go through things more than other tonneau reviews I’ve seen. Do you get any snow where you live and any comments on your cover dealing with the snow?
Yes, we get snow, never had a problem with it. I’ve even rolled the cover up while it was snowing, and the only issue was snow stuck in the snaps. Once that was cleared out, the snaps worked and the cover stayed open.
-John